FATHERS! A friendly challenge! Spend time with your children.
My daughter Allegra had an idea for a pretty neat piece of furniture she wants to make and sell. I helped her with the design; which I’ll post later, and realized that it could be made from local wood. We live in a hardwood forest, with more variety than anywhere else. For years I’ve been trying to figure out how to make a budget sawmill. I still might follow through on that; but for now I’ve come to a different realization.
I have experience with getting whole trees. Usually dead ones, which make good firewood. Getting the tree, cutting it in sections, loading them on the truck, and cleaning up the branches is a lot of work, and time consuming. A lot of guys around here own portable saw mills, and sell rough cut lumber at a reasonable price. I’m thinking it makes more sense to buy the wood from them, and concentrate on planing it. I already had some pieces of rough cut pine, one piece of Sassafras, and several pieces of Poplar.
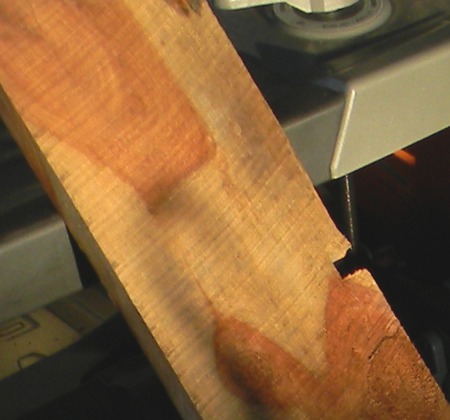
So after some looking around, I decided to buy a reconditioned 13 inch Rigid planer. I don’t know anything about these tools, but man, this one works sweet. I read the instructions, then gave it a try. The porch where I had it was too narrow for the long pine board, so I went and got a rough cut board from a scrap pile. In the first picture, you can see the planer and the piece of wood. Turns out it was Eastern Red Cedar. The pictures show how it looked after planing and adding a coat of clear Shellac. 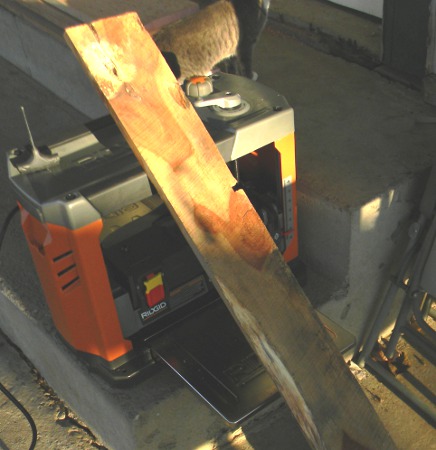
 About all you can see in the picture above are the saw marks from the big circular blade.
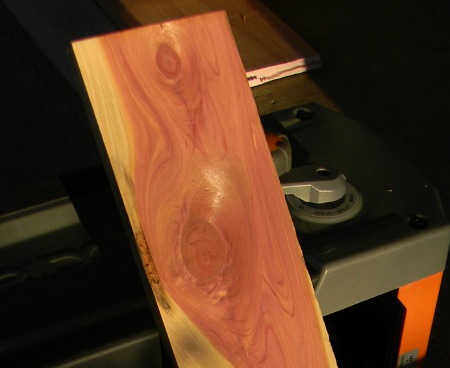

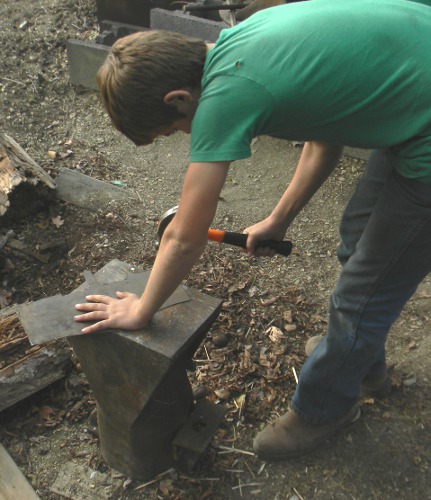
 Everybody in the family oohed and awed at the results, and with good reason. Below are pictures of an improvised anvil I made. It’s from a RR freight car coupler. I guess this is a shock absorber device. I was given permission to take it home. At first, I thought that there was a big compressed coil spring inside the housing. So I was very careful when removing the parts. I pointed the retainer parts out at the pasture, and leaned as far away as I could when using my cutting torch and sledge hammer.
I was relieved to learn that there are actually round rubber pads in the shaft. In this picture you can see the shaft housing, the rubber pads, three retainer clips, and the round piece of steel held in by the three clips. They just fell out, no Boing! You can also see the cut I made with the torch, and the crack which caused this part to be replaced.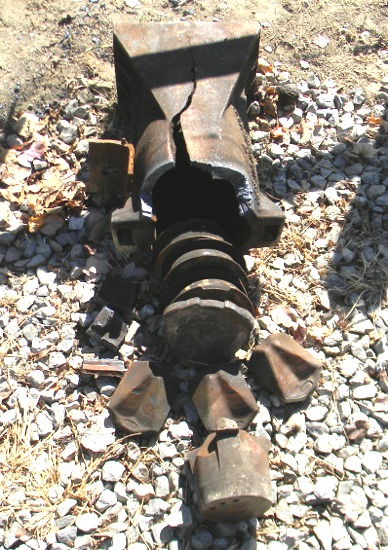
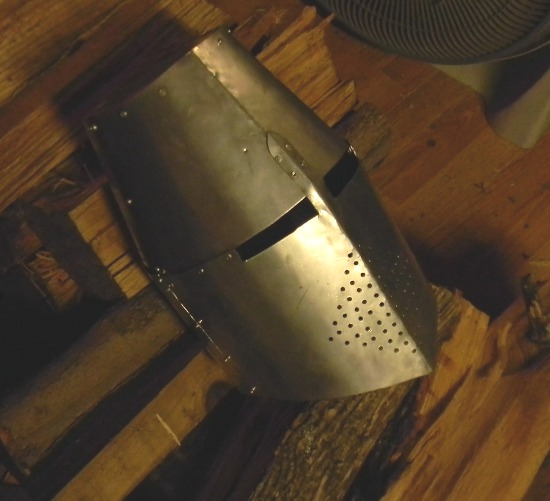
I don’t spend as much time with the children as I would like. In the pictures below, you see my 12 year old son Luke using the new improvised anvil to make armor from some pretty thick steel. He watches Utube videos about how the armor is made. In this project, I supplied the anvil, sheet steel, and rivets. He supplied the determination, and some great results!